Tuesday 31 May 2011

System 48


I wasn't 100 percent happy with the fit-up of the seat tube socket on the bottom bracket of Ben's bike. The casting was just a bit more sloppy than what I'm used to using with 56% silver.

The issue here is that 56% silver is not at all forgiving of gaps. It flows like water (which is a good thing, as I can get really good penetration when everything is just so), but has practically no ability to fill.

So I asked for advice on the framebuilder's list, and was pointed in the direction of System 48 filler and flux, by Wade Barocsi of Cycle Designs. This stuff is still a silver filler, but is formulated so it's got an ability to fill a little. Like 56%, it's revoltingly expensive. I do wish people wouldn't speculate on silver and push the prices up.

In use it's clearly more viscous than 56%. You've gotta give it encouragement to draw it through the lug. It does though, and the result is really strong, without having to go to higher temperature fillers like LFB. The cable guide on the other side is held on with 56%, and I didn't reflow this join.

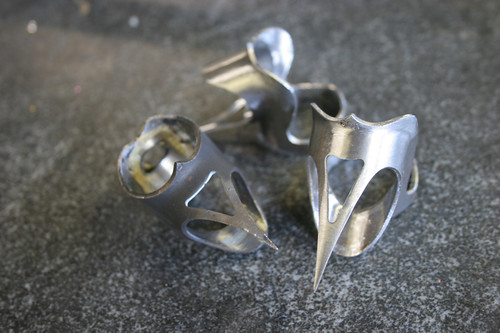
The picture shows the result, immediately after soaking the flux off and prior to any clean-up, so it still looks ghastly. You can see it's penetrated 100%, and also that I was a little on the generous side.

Another thing you can see here are pins. I pinned this join, and soldered it out of the jig. I'm quite happy with the result - it's a hell of a lot easier to get access.

Monday 16 May 2011

Lugwork - 2


I thought I'd show the process of putting a cutout in a lug.

The lug I'm working on here is the upper head lug for Ben's bike. It's a Llewellyn Cadenzia XLH lug, and I'm doing a little work to it to make it look more like a classic Bocama Professional.

I start by roughly marking where the cutout will be, using a sharpie. Then I put four center punch marks in; one in a little from each of the triangle vertexes, and a third right in the middle.

Next I use a pillar drill to drill a 1/8" hole where each vertex will be, and then a bigger hole in the middle, as shown below:


Next step is to open out the holes to form a rounded triangle. I predominantly use a 1/8" diameter Swiss No. 2 round file to move the vertex around, and a three square Swiss No. 2 file to bring the sides down towards the vertexes:


Once I'm reasonably happy with the shape, I swap to needle files. These are mainly used to reduce the diameter of the vertexes and smooth everything up:


These cutouts have a matching one on the other side, so I do them both at the same time, doing plenty of measuring to ensure they match. The final step with this lug is to round out the cheeks a little to soften the look. Here's how it ends up looking along with the lower head lug, which I did previously:

Tuesday 10 May 2011

Lugwork


I confess this is probably my favorite part of framebuilding; where I get to play around with the lugs and make them look right.

I started by quickly filing and sanding the casting roughness from the derailleur tab and STI cable bosses. There wasn't any real modification done to these, save to file the loveheart cutout on the STI bosses into a rounded triangle, so that it matches the other lug cutouts I plan for the frame.

Next I removed the rack mounts from the dropouts, and cut some small triangles into them. As with the other stainless parts, much of the casting roughness has been files off and I've hit them with some emery. Once they're on the chainstays, I'll do some more serious sanding and polishing.

Finally I went to work on the lower head lug. I first cut a triangular cutout in the tang, and then removed the cast-in STI bosses. They looked a little full then, so I cut more triangles in where the STI bosses had been, and rounded the sides a little. I'm quite happy with the look now.

Next step is to replicate the cutouts and shaping on the upper head lug, and then decide what I want to do with the seat lug.

Saturday 7 May 2011

Ingredients


Here's the ingredients that I'll use to make Ben's frame (from the top of the picture):

  • Head tube: Columbus 36mm.
  • Down tube: Columbus Life 34.9mm x 650mm
  • Top tube: Columbus Life 31.7mm x 600mm
  • Seat tube: Columbus Life 31.7mm x 635mm
  • Seat stays: Columbus Life 17mm, tapering to 12.5mm tips.
  • Chain stays: Columbus Life 30mm x 17mm oval, tapering to 12.5mm tips.
  • Brake bridge: Silva art 189 with art 362 reinforcement diamonds.
  • Dropouts: Llewellyn LRD72/SS stainless, 72 degree angle.
  • Front derailleur tab: Silva art S286 stainless.
  • BB cable guide: W2081 stainless.
  • Bottom bracket: Long Shen LB09-3
  • Lugs: Llewellyn Cadenzia XLH.
  • STI bosses: Llewellyn LL-09-35 with Ceeway brass deluxe STI adjuster screws.
  • Brake cable tunnel: Silva art 150 with art 141 reinforcement diamonds.
  • Rear derailleur cable boss: Silva art 152.
  • Bottle bosses: Silva art 471 with art 361 reinforcement diamonds.

Not shown, of course, are the 56% silver rod that I'll use to braze the frame together, nor the paint.

Next step is to do some lug prep - I'm going to cut the STI bosses off the lower head lug, and cut triangles in many of the lugs, to give them a classic Bocama look - something like this:


Then I'll file and sand the casting marks out of the dropouts, front derailleur tab, and STI cable bosses in preparation for polishing once they're brazed in place.

Only then will I start cutting and mitering tubes.