Tuesday, 17 November 2015

Thinking about a trailer.

I'm starting to get a bit more specific about what I want in a trailer. This is bad, because it means I'm up for buying something pretty expensive or else building one. I'm starting to favour building one, as the one quote for a half-way reasonable trailer I got from a mob down in Perth was an astonishing $3800. I guess they figured they'd try one on.

I'm rather liking the idea of a "break back" trailer. Additionally I could build a nice long draw-bar, and organise it so I could remove much of the front of the draw-bar when the boat is in the garage, minimising length (which is important, as my garage is only barely longer than Elena).

Here's a quick sketch of what I'm thinking of. Four bits of 65x35mm RHS, one bit of 65mm SHS, and the rest is bits from BCF or from the local car wreckers. There's a bit of welding involved, but It's about bloody time I bought myself a welder.

Saturday, 14 November 2015

First topcoat on the interior

Finally finished with fillets. Here's the first coat of topcoat. It's International Toplac (there's a nice guy here in Geraldton who I buy the stuff from, who's wife's name is also Suzy), so this has become my paint of choice. He threw one unit of 127 tint (I think that's burnt sienna) in, to make it a really light off-white, as the standard Toplac white was really white).

If you look carefully at the first photo you can see I've routed channels in the supports for the coaming down the port side. These will be used to run cables from the front thwart, where the battery and radio will live, to the cockpit, where I'll have my handpiece. I'm thinking of going with a Icom IC-M400bb radio, which has the controls on the handpiece, so it should be nice and neat and unobtrusive.

I'll do another couple of coats, sanding in-between, and then put the coamings on.

Wednesday, 11 November 2015

Fillets and undercoat on the interior.

I've made a real breakthrough with filleting. When I put the deck on, I used heaps of epoxy, as I didn't want voids. It was hard to get in to remove the squeezage, so I didn't. The result is really awful epoxy blobbage under the deck. I removed a lot of it with a heat gun and paint scraper, but it's really difficult to get to, and I'm working upside down with the hot air gun and scraper shoved into narrow spaces, which invariably hurts.

So, I figured I have the perfect tool for sculpting and just brute force removing material. It works nicely on aluminium cylinder heads, so there's no reason it won't work on soft epoxy. It's my die grinder. So in goes a solid carbide 12mm rounded die, and off I go.

It's just perfect. It eats epoxy, leaving a perfect radiused surface finish better than I could ever hope to get with sandpaper, and as a bonus it actually cuts epoxy better than wood, so once I'm down to the wood it loses it's bite.

So the interior painting process is one of applying a coat of undercoat, finding bits that are awful, going back to filler, cleaning that up with sandpaper and my die grinder, doing more undercoat, etc. At some point my OCD will finish and I'll apply the top coat.

Here's the first coat of undercoat. I know. it looks absolutely dreadful.

Sunday, 18 October 2015

Delicate work on the mast

I figure one of the reasons I'm doing a hollow mast is to hide things in it. Specifically hide the sail track, halyards, and VHF radio antenna. I've been spending a little time building a prototype antenna, and working on the details of halyard management and sail track.

First the antenna. I based the design off this five element collinear, using 086 semi-rigid coax for the 1/2 wave sections and a 1/16" brass rod for the 1/4 wave section on top. By using 086, which is about 2.2mm diameter, I'm able to insert the whole antenna in a 6mm diameter polyethylene sleeve to seal it up nicely, and then put the whole shebang in the 1/4" slot that I've run up the antenna.

Here's detail of one of the joins between 1/2 wave sections, along with the polyethylene sleeve (actually air line):

I'm having all sorts of difficulty getting a match out of this arrangement. I was expecting to have to trim the radiators to account for the dielectric constant of the sleeve and wood, but it looks like the whole thing is just miles from 50 ohms. A network analyser plot is shown below:

Not so good. The marker is in the middle of the marine VHF band, at 158 MHz. The only promising resonance appears to be due to the feed line, at 90 odd MHz. I'm debating whether to design a stub match to brute-force match the antenna to 50 ohms, or else to abandon the idea of hiding an antenna in the mast and instead run RG-223 up the slot I've routed and bring it out the front of the mast above the jib halyard.

So while vaccilating I did some other work on the mast. First I cut some exit slots for the jib halyard and main halyard:

Next I cut a 12mm diameter dowel from Jarrah, and used it to plug the top and bottom of the sail track. By using Jarrah here, I get the best possible strength for screwing the halyard block and (possibly) the vang eye. I might yet run the vang off the tabernacle.

With the top and bottom of the sail track plugged, I then had to machine an escape for the slugs, just above where the boom will attach:

Finally I've started making reinforcing blocks for where the hardware attaches. The one shown is where the spreaders attach:

This one has both halyards run past it, so I've got a large ramped slot so the 8mm halyards can run past freely. The next one up will be where the shrouds and jib halyard attach, so it'll have to be made just so to guide the jib halyard to its sheave. Similarly the block for the top, which will (sort of) seal up the top of the mast, will have to include a path for the main halyard to exit via a sheave.

I'll also fill in the bottom of the mast, with Jarrah for strength, from the foot to about 200mm above the boom. I'll put a very gradual taper in this block to ensure I'm not creating a stress riser, plus a slot so that I can bring the antenna lead out the bottom, plus allow water to drain.

Saturday, 3 October 2015

Getting back to work on the mast

So, with the bench knocked over, it's back to the mast. The plan is to build a modified birds mount mast, from Jarrah and Tassie Oak, with a sail track cut into the back. I previously knocked out a prototype, so I could figure out how I was going to do this The prototype is just 30cm long. The real thing is 6.1m long.

Unlike a regular birds mouth mast, which has a structure that's self-supporting and self-cantering, and thus keeps itself straight during assembly, my modified birds mouth doesn't. I've already constructed the sail track section from two pieces of Jarrah. This exercise in wrestling a pair of floppy staves on the floor of the hallway was what convinced me that I needed to build a decent bench for the purpose.

Here's the sail track piece sitting on the bench, with a couple of 3m planks clamped to the face of the bench as a straight-edge. There's quite a bit of wobble in the sail track.

Normally I would scarp planks to make a long plank, then join it to the structure. I don't have enough clamps to do the whole 6.1m length, so instead I've cut the scarfs, and am gluing on a pair of 2.4m long staves at a time, working my way up the mast and gluing the scarfs as I go. I quite like this technique - it makes for much more manageable quantities of goop.

At the top of the mast I'm tapering staves, so in order to keep everything lined up I add cardboard spacers to account for the taper.

Once this pair of staves set up, I cut the detail into the back of the sail-track-containing laminated plank using my trim router, so that I can join the next couple of staves. I've gone off the prototype a tad - rather than a pair of v-shaped cuts in the back to reduce weight, I've just done one cut, 6mm wide by 6mm deep, with a round nose cutter. This groove will be a nice snug fit for some RG-58 coax, which I'll use to build a VHF collinear antenna, embedded in the mast.

Here's a pic of some side staves being test-fit, looking into the inside of the mast. The sail track is down, against the bench. I've made the mast about 1mm wider than the prototype, so it fits my boom fitting better. Doing things a couple of bits at a time gives me much better control of the glue lines, and allows me to keep things significantly cleaner.

Sunday, 20 September 2015

Finally knocked the bloody bench/storage unit over.

So Bunnings suddenly put most of their Tassie Oak on clearance. I panicked and bought a huge pile, as I figured I could make drawers and cupboard doors with the stuff. So I did.

Buying a biscuit jointer helped a pile, but it still turned my "couple of weekend's work" bench into a couple of months solid effort. One of the most laborious jobs was cutting the dovetail joins for the drawers, which I did by hand. The first one is pretty average, but I learned reasonably quickly that if you do the markup with a scalpel, and sharpen your chisels often, they actually work pretty well.

Here's what a dovetail looks like together. No, you can't see my first try.

Once the drawers are assembled, there's a happy home for all my sharp things, where they won't get full of dust and shavings.

Noisy stuff gets stored in the cupboards underneath. Maggot really loves the cupboards, as they're joined up, so he can go in one end and come out the other.

And there's even just enough room to squeeze between the arse end of Elena and the new bench with the garage door closed.

Now that there's more room, I figured it'd be nice to put bigger speakers in the garage. These are old Infinity 1500's. They have 8" woofers and play bad eighties rock really well when driven from a little 50 watt MOSFET amp. I finished the base with a couple of coats of Scandinavian oil and used linseed oil thinned out with gum turpentine for the top.

Now, I seem to recall I was building something else out of wood before I got sidetracked with bench making...

Sunday, 9 August 2015

Bench part 3...

More work on the bench. Once the many pieces for the base are dowelled and joined together, it's got some serious length. Perry and I moved it into it's final resting spot and started work on the top, which is made from 150x19 Jarrah planks.

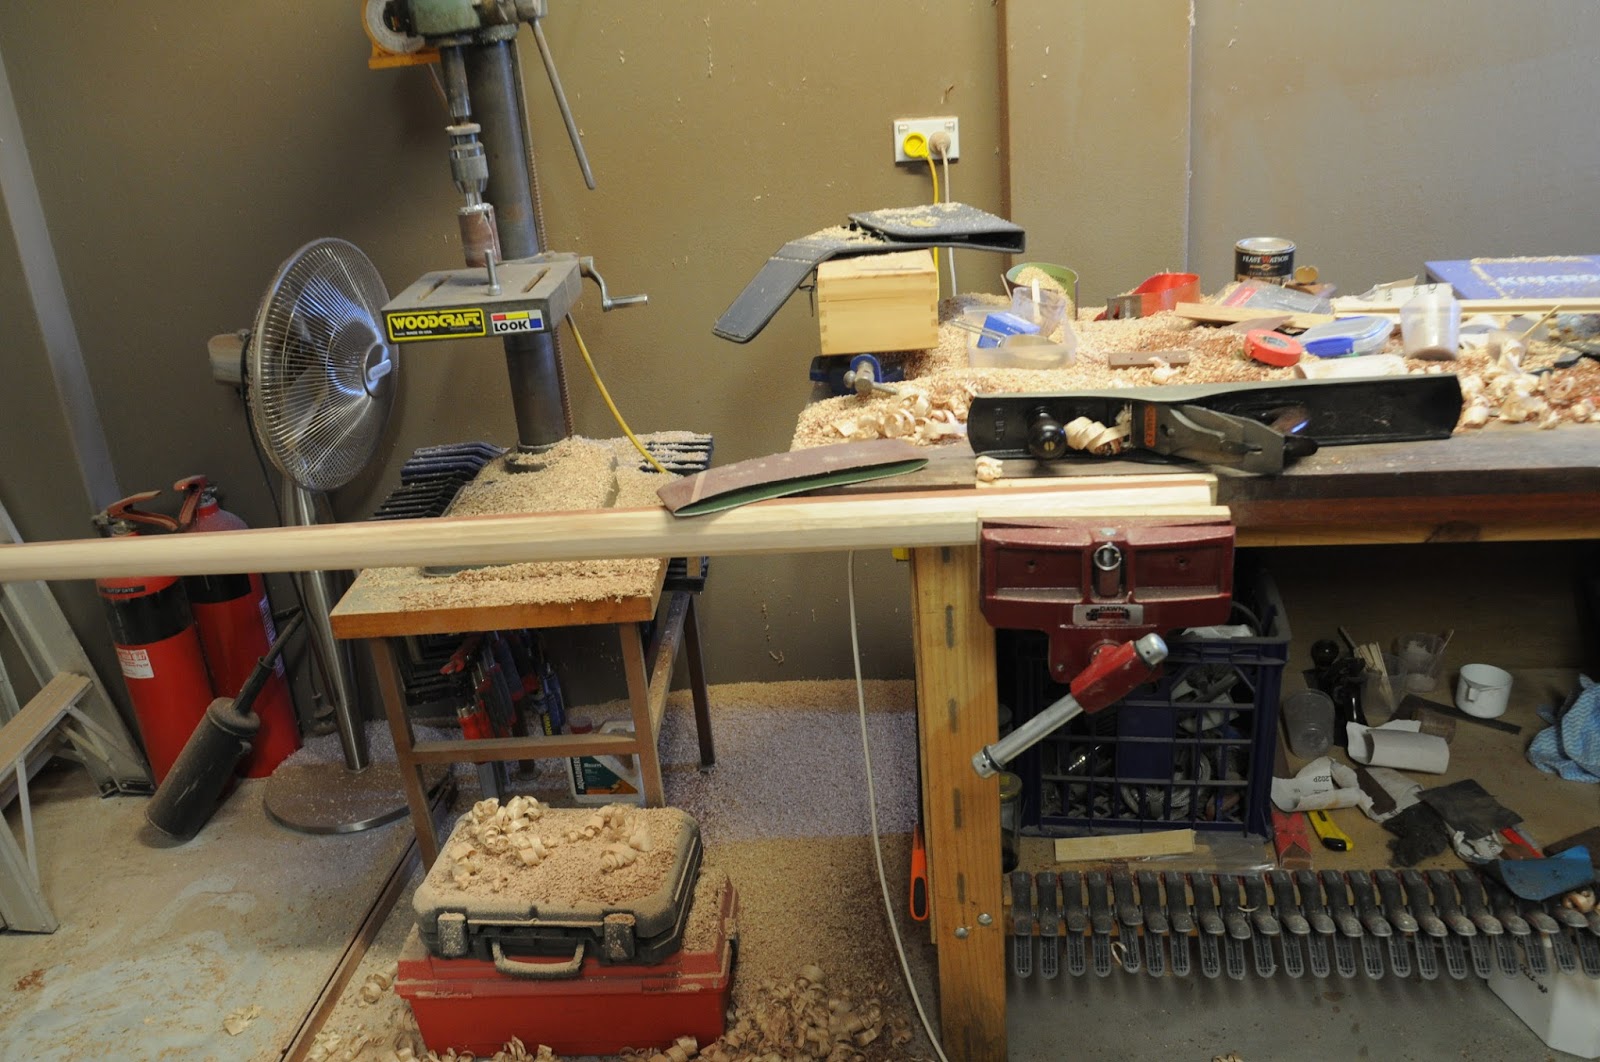
Here's my trusty smootherator (my Stanley no. 7 plane), part way through making the top lovely and flat.It's a hell of a workout and leaves me exhausted but satisfied. There';s no better way to flatten a bench top. Just take lots of super-fine cuts in a crosshatch, at 45 degrees to the grain orientation.

The structure chosen allows us to easily build up the top without resorting to a gazillion biscuits and clamps. Instead it's just assembled on the cross-pieces, with PVA and nails.

Here's a view along the bench during flattening. A lovely, long accurately straight and flat work surface.

Yet to go is to put shelves in and build cupboard doors, but that can wait until after I've made my mast on it.

Monday, 27 July 2015

More bench making

I've been off work on holidays for a week, and thought I'd be able to get the bench knocked over in that time. Turns out it's a project in itself. So far I've got all the timber cut and dressed, and now I'm starting to assemble the bits to create the frame:

That's half the frame. The end pieces are solid timber, and I'll put a 4mm odd ply back on the whole thing to brace it. I'll make the fixed shelves from 9mm ply, sitting on the 90mm wide Tassie Oak cross pieces. I'll add some holes in the legs for adjustable shelves as well.

There's quite an amazing amount of timber in this. So far the only metal bits are the adjustable feet, which are already coming in handy as my garage floor is a long way from flat. I've used about 150 little dowels so far.

The other thing visible in the photo is the complete shambles aboard Elena. I'm hoping that once I have more storage places in the garage there'll be rather less crap left on horizontal surfaces.

Monday, 20 July 2015

A diversion for bench-making

I've been gnashing my teeth lately wondering how best to support my mast and boom while gluing up the staves. I tossed around a bunch of ideas; buying a bloody big plank to clamp everything to, buying some steel or aluminium RHS... Each of these options is moderately expensive and I'm left with a bloody big lump of wood or metal that I have no idea what to do with, and that will be difficult to store.

Rather than a quick jury-rigged solution, I thought instead I could build a nice spar bench, on which I can build the mast and boom, and which would be a useful piece of furniture in it's own right, giving me a place to store a whole pile of stuff that rattles around my main bench and floor, and giving me a really nice work surface in addition to my main bench.

So the spot that's good for this is across the back of the garage. It's about 6.5m, and will allow me to house a bench a little over 4m long, most of the length I need for my 6.1m mast. If I build it the same height as my existing bench (930mm) then there's always the possibility of butting the two up and doing some levelling to get a 6.3m long flat surface, at least temporarily, and with the aid of a forklift or small group of weightlifters...

Alas I can't build a really deep bench in the spot chosen, as it subtracts from the length of the garage, and I've only got about 900mm between Elena's transom and the wall when her bow is just inside the door. So I figured 450mm deep would be adequate, and knocked something up in sketchup:

A nice solid Jarrah top, Tassie Oak framing, and sides, back and shelves in ply. The gaps across the top will accept 450mm wide by 400mm deep drawers, and there's some useful cupboard space underneath. For now I'll build it open as in the drawing. I'll add cupboard doors and drawers as finances allow.

Here's a start on my legs:

They're made from 90x19 and 42x19 Tassie Oak, joined with a mortise for lots of strength. I'm adding adjustable feet so the whole assembly can be really accurately levelled.

The timber for the bench top is gorgeous. 150x19 Jarrah planks. Mogget thinks they're a great idea. I'll laminate them onto a couple of bits of 19mm thick ply, for added strength, then add a lip on the front for face clamping. I confess I did ponder building a 40mm thick solid Jarrah bench top, but couldn't justify the added expense.

Sunday, 5 July 2015

Bowsprit

The bowsprit John recommends for the Navigator is a 100 x 40 plank, tapering to 40 x 20 at the front.

I think that's boring, and not nearly pirate enough for Elena. So I figured I'd do a more traditional round bowsprit instead. This will go nicely with a neat Davey 2 eye cranse iron at the front for the bobstay and jibstay attachment. I'll bend up some bronze plate and fashion my own gammon iron and heel.

In any case, I bought some Jarrah and Tassie Oak, tapered the Jarrah from 22 thick at the back of the sprit to about 10 thick at the front, then laminated the three together. Once it set up I went at it with the power plane to make a 60 x 60 square tapering to 40 x 40 at the front.

Then I marked it up and turned it into an octagon with the power plane and my Stanley no. 7, then used the no. 7 to make it 16 sided. Finally I used an 80 grit belt to round it out by hand.

Here's what it looks like temporarily on the boat. There's no way I'm closing the door with that attached.

Oh, the top plank is painted with one coat of Toplac "Donegal Green". I'm quite happy with the look.